A beginner espresso setup should make it easier to learn one repeatable routine. The expensive mistakes happen when someone buys a handsome machine, a cheap grinder that cannot make small useful adjustments, and a drawer full of accessories before they have pulled ten shots. Espresso is sensitive to grind, dose, yield, and time. A grinder that gives you control and a scale that gives you a number are more valuable than a novelty tamping mat or an oversized knock box.
For most people, start with a Breville Bambino Plus and a Baratza Encore ESP. The Bambino Plus is compact, heats quickly, uses a 54 mm portafilter, and can steam milk automatically or manually. The Encore ESP has a dedicated fine adjustment range for espresso and still handles filter coffee. It costs more than relying on pre-ground coffee, but it gives you a setup that can react when a coffee runs too fast, too slow, too sour, or too bitter.
The Breville Barista Express is the all-in-one choice for a buyer who needs one appliance on the counter and accepts the limits of an integrated grinder. The Gaggia Classic Pro E24 is the traditional upgrade for someone who wants a 58 mm platform, a brass boiler, a three-way solenoid valve, and more hands-on work. Both can make sense. Neither is automatically better than the Bambino-and-Baratza pairing for a person who wants a clean, straightforward first setup.
Buy a machine only after you have decided how much ritual you want. If you drink espresso or milk drinks most days and are willing to weigh coffee, make a small grind adjustment, and rinse the machine, a manual espresso setup can be deeply satisfying. If you want a button to produce coffee before work with almost no attention, look at a superautomatic machine, capsules, or a good filter brewer instead. There is no prize for choosing a workflow you resent.
Our beginner espresso picks
| Pick | Best for | Why it works | Main compromise |
|---|---|---|---|
| Breville Bambino Plus + Baratza Encore ESP | Most first serious setups | Separates the machine and grinder, heats in about three seconds, includes useful starter parts, and gives espresso-specific grind control. | Two appliances take more counter space and you still need to learn dosing, tamping, and cleaning. |
| Breville Barista Express | One-machine kitchens | Built-in conical-burr grinder, 54 mm portafilter, manual steam wand, hot-water outlet, and a compact all-in-one workflow. | The grinder and machine cannot be upgraded separately, and its 16 settings offer less room to fine-tune than a dedicated espresso grinder. |
| Gaggia Classic Pro E24 + Encore ESP | Buyers who want a traditional 58 mm platform | Brass boiler and group, 58 mm stainless-steel portafilter, solenoid valve, manual steam wand, and a familiar format for accessories. | It is a more manual learning experience and needs a separate grinder, scale, tamper, and milk jug plan. |
What to buy first: a capable grinder and a simple machine
The grind controls the speed at which water moves through an espresso puck. A small change can turn a fast, thin shot into a slower, denser one, or take a slow, bitter shot in the other direction. That is why a grinder is not an afterthought. Pre-ground coffee can make a drink from a pressurized basket, but it does not give you much ability to respond to a coffee that tastes wrong. The same bean also changes as it ages, so a single fixed grind setting would not solve the problem anyway.
Start with the Bambino Plus if you want the espresso machine to stay simple. Breville lists a 54 mm stainless-steel portafilter designed around an 18-gram dose, a ThermoJet heating system that reaches operating temperature in about three seconds, PID temperature control, and a 64-fluid-ounce water tank. The machine is only 7.5 by 13.5 by 12 inches, which matters on a shallow counter. It has one- and two-cup buttons, a steam button, and a 1,560-watt heating system.
The Plus model’s practical distinction is the milk system. Breville lists three adjustable milk temperatures and three texture levels for its automatic wand, while also allowing manual steaming. That is particularly helpful for someone who wants a cappuccino or latte on a weekday but does not want every drink to become a milk-steaming lesson. It also gives you room to learn later without having to replace the machine immediately.
The Bambino Plus ships with a 54 mm tamper, a 16-ounce stainless-steel milk jug, single-wall and dual-wall baskets for one and two cups, a dosing tool, and cleaning pieces. It also has a two-year limited warranty in the United States. Those included items do not remove the need for a scale, but they keep the initial shopping list from growing into an equipment project.
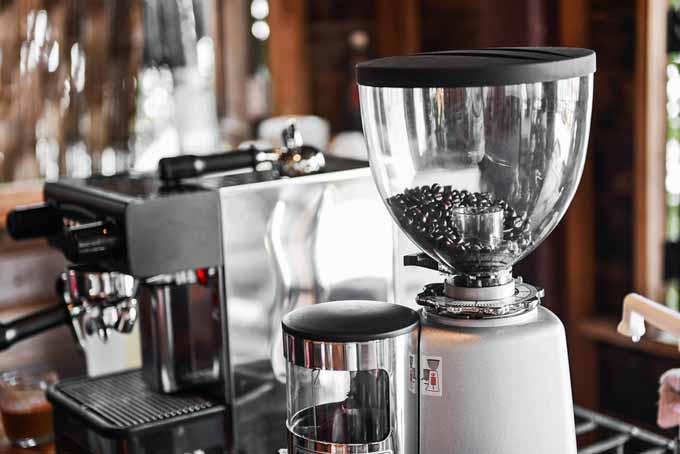
Pair it with the Baratza Encore ESP. Baratza built this version of its Encore around espresso as well as filter coffee. Settings 1 through 20 are its high-resolution espresso range, while 21 through 40 cover coarser methods such as drip, French press, and cold brew. It uses 40 mm conical steel burrs, has a 300-gram bean hopper, and includes a dosing cup sized for a 54 mm portafilter with a 58 mm adapter ring.
That dosing cup makes a real difference to the beginner workflow. Grind into the cup, transfer the grounds to the basket, settle them gently, and tamp. It is cleaner than trying to catch every ground directly in a portafilter. The Encore ESP is not a silent grinder, a grind-by-weight machine, or a stepless prosumer model. It is the choice for a person who wants sensible adjustment, a repairable brand with documented support, and the ability to make non-espresso coffee without buying another grinder.
Buy the Bambino Plus and Encore ESP together if you have room for two small appliances and want the most flexibility from your first serious setup. Skip the Plus for the less expensive Bambino only if you know you do not need automatic milk texturing and the product bundle makes the savings worthwhile. Skip both if you will never weigh or adjust your coffee; an all-in-one or automatic route will be less frustrating.
Best all-in-one option: Breville Barista Express
The Breville Barista Express is for a buyer who wants a legitimate hands-on espresso workflow without finding space for a separate grinder. It combines a conical-burr grinder, a 54 mm stainless-steel portafilter, 16 grind settings, a manual steam wand, and a dedicated hot-water outlet. Breville lists a 67-fluid-ounce water tank, a 250-gram locking bean hopper, a 1,600-watt Thermocoil system with PID temperature control, and a pressure gauge on the front.
The appeal is obvious. Beans go in the hopper, the portafilter sits in the grinding cradle, and the machine keeps most of the work in one footprint. The Barista Express includes a dosing funnel, dosing-trim tool, 54 mm portafilter, single- and dual-wall baskets, integrated magnetic tamper, stainless-steel milk jug, cleaning disc, tablets, brush, and cleaning tool. That is a more complete box than many traditional machines provide.
Its drawback is just as straightforward: an all-in-one machine ties together two components that age and improve on different schedules. If you later want more precise grind adjustment, you cannot replace only the grinder and keep the espresso machine in the same tidy form. The 16 settings can work well for a beginner, but a separate grinder such as the Encore ESP gives more space to make small changes as beans change.
Choose the Barista Express when counter space and one-appliance simplicity are more important than modularity. It is a sensible fit for a household that wants espresso, milk drinks, and hot water from one machine and is happy to learn manual steaming. Do not buy it because it appears to eliminate the need to learn espresso. You still need to distribute grounds, tamp consistently, watch the extraction, clean the steam wand immediately after use, and adjust the grind when the coffee tells you to.
Traditional upgrade path: Gaggia Classic Pro E24
The Gaggia Classic Pro E24 is for the person who wants a more traditional, deliberately manual espresso machine and is comfortable building a kit around it. Gaggia’s current North American product page describes a lead-free brass boiler and group head, a 58 mm stainless-steel portafilter, a three-way solenoid valve, and a commercial-style steam wand. It has a 2.1-liter water tank and a simple control layout built around rocker switches.
The 58 mm format is one reason to choose it. It is common across many enthusiast machines, so baskets, tampers, dosing funnels, and other accessories are easy to find. That does not mean every 58 mm item fits every Gaggia portafilter perfectly; accessories have dimensions, lip shapes, and tolerances. Check the exact model and seller description before ordering. Still, this is a more open platform than a proprietary appliance with a smaller basket.
The updated brass boiler is meaningful because boiler material and capacity affect heat behavior and steam use. It does not make the Gaggia automatic or effortless. The Classic is a single-boiler machine, so brewing and steaming involve more attention to sequence than a dual-boiler machine. It also does not include an espresso grinder. Plan to pair it with the Encore ESP or another grinder that can make fine, controlled adjustments.
The Gaggia makes sense for a person who is interested in the craft itself: a 58 mm basket, manual steaming, a simple physical interface, and an ownership path with many compatible accessories. It makes less sense for someone who wants milk drinks ready at the push of a button or who is unwilling to learn a small routine around heat, purging, and cleanup. A Bambino Plus is the kinder first machine for many busy homes.
The accessories that make a difference
A 0.1-gram scale with a timer
Buy a small coffee scale before buying an aftermarket tamper. A scale lets you weigh the dry dose and the liquid yield, which turns “that shot seemed off” into useful information. A starting espresso recipe is often expressed as a ratio. A common baseline is 18 grams of ground coffee in and 36 grams of espresso out, a 1:2 ratio. That is not a taste law. Some coffees taste better shorter or longer. It is simply a stable place to begin.
Choose a compact 0.1-gram coffee scale with a timer that fits on your machine’s drip tray under a cup. Before ordering, measure the clearance from the portafilter to the tray. A wide kitchen scale may be accurate and still be useless if it cannot sit beneath the spouts. Rechargeable scales are convenient, but any reliable scale is better than measuring an espresso shot by crema level or liquid volume alone.
Use the scale for the first several weeks even if your machine has programmed shot buttons. Programs are based on time or volume, while coffee density and crema can change the result. Once you have a recipe you like, a programmed button can save time. The scale remains the tool that tells you when a new bag of beans needs a small adjustment.
A simple tamper that fits the actual basket
The Bambino Plus includes a 54 mm tamper, and the Barista Express has an integrated removable 54 mm tamper. Start with them. A weighted, precision-machined replacement will not repair uneven distribution or a grind that is too coarse. The Gaggia includes a basic plastic tamper, so a properly sized replacement is a more sensible early purchase for that machine.
Match the tamper to the basket, not merely the marketing label on the machine. A 58 mm basket may work best with a tamper that measures slightly under 58 mm, and 54 mm systems need their own size. If an accessory listing claims universal compatibility, slow down and check measurements. A tamper that is too small leaves a loose ring at the basket edge; one that is too large can bind or scrape.
A milk jug if you drink milk drinks
The Bambino Plus and Barista Express include stainless-steel milk jugs. The Gaggia plan should include one. Choose a size that matches the number of drinks you make. A very large jug is awkward for one cortado or cappuccino, while a tiny jug is hard to manage for two drinks. Start with a modest stainless-steel jug, keep the steam tip just below the milk surface at the beginning, and wipe and purge the wand immediately after each use.
Do not treat latte art as the first benchmark of a good espresso setup. Learn to produce milk with a texture you enjoy, then work on pouring. The quality of the espresso, milk temperature, and daily cleanup matter more than making a perfect heart on day three.
Filtered water and cleaning supplies
Water affects both taste and machine maintenance. Follow the machine maker’s water and descaling guidance rather than blindly using distilled, softened, or heavily mineralized water. Some machines accept water filters; others need a specific descaling routine. Keep the basic cleaning disc, tablets, brush, and manual where you can reach them. A machine that is difficult to clean becomes a machine you avoid using.
Keep a clean microfiber cloth near the machine. Wipe spills, purge the group after removing the portafilter when your machine instructions call for it, empty the drip tray before it becomes full, and rinse the basket after each drink. These habits take less time than rescuing baked-on milk residue or a neglected machine later.
Accessories to leave for later
Bottomless portafilters: They can show uneven flow and are fun once your workflow is consistent. They are not necessary to learn basic espresso, and they can turn a messy puck into a splattered counter. Use the included portafilter first.
Distribution needles, dosing funnels, and puck screens: These can help tidy a particular routine, but they are not mandatory purchases. A dosing funnel can be useful with a messy grinder. Distribution tools may help some people create a consistent habit. Buy one only after you identify a real problem. If the shot is poor because the grind is wrong, another tool will not solve it.
Knock boxes: A sturdy bowl or a compost container can be enough at first. A dedicated knock box is convenient for a household making several drinks every day. Pick one with a stable base and a removable knock bar if you decide you need it.
Pressure gauges and modification kits: These are enthusiast projects, not starter necessities. Learn your stock machine, document a simple recipe, and maintain it correctly before changing internal parts. Modifying a machine can affect support or warranty coverage.
How to pull your first repeatable shot
- Warm up and rinse as your machine directs. A fast-heating machine still benefits from a quick rinse through the group and a dry basket. A boiler machine may need more time; follow the manual for your model.
- Pick one coffee and one recipe. Avoid changing beans every day while you are learning. Start with the basket the machine recommends and a target such as 18 grams in, 36 grams out.
- Grind into the basket or dosing cup, then distribute and tamp level. The tamp should be level and repeatable. You do not need to chase an exact arm-force number.
- Weigh the espresso yield and note the time. Put the cup and scale in place before starting. Stop the shot at your target yield, then taste it.
- Change one variable at a time. If the shot reaches the target yield much too quickly and tastes thin or sharp, move the grind finer. If it crawls and tastes harsh or dry, move it coarser. Make a small change, repeat the same dose and yield, and taste again.
Time is a helpful diagnostic, not the whole recipe. Breville’s espresso guidance uses roughly 25 to 30 seconds as a common starting zone, while its own dial-in material describes 1:2 as a typical ratio. A light roast, darker roast, different basket, or different taste preference can move the preferred result. Write down the bean, dose, yield, grind setting, and what you tasted. That turns trial and error into a record you can use.
Do not change the dose, yield, grind, tamp, machine temperature, and bean all at once. Espresso can feel mysterious only when every variable moves together. Hold most variables steady. Adjust the grinder in small steps. Give the next shot a fair comparison.
Machine size, compatibility, and counter planning
Measure the counter before ordering. The Bambino Plus is narrow but needs space for a grinder beside it. The Barista Express is wider and deeper but combines the grinder and machine. The Gaggia has a compact footprint, but its separate grinder, scale, milk jug, and accessories still require a usable work area. Leave room to remove the water tank, open the bean hopper, knock out a puck, and wipe a spill.
Portafilter size affects accessory shopping. The Bambino Plus and Barista Express use 54 mm systems. The Encore ESP includes a 54 mm dosing cup and a 58 mm adapter, so it works conveniently with either those Breville machines or a 58 mm Gaggia setup. The Gaggia’s 58 mm format gives you a wider traditional accessory ecosystem, but do not buy accessories simply because they are available. The stock parts tell you what you actually want to improve.
If you also make filter coffee, the Encore ESP has an advantage over a dedicated single-purpose espresso grinder. Its coarser half is designed for filter methods. For more context on using one grinder across coffee styles, see our guide to coffee grinders. If espresso turns out to be more work than you want on a given morning, a pour-over or drip setup remains an excellent way to use the same beans; our pour-over coffee guide covers that route.
How we researched this guide
We reviewed current manufacturer product pages, manuals, specifications, and support material for the machines and grinder named here. We checked portafilter size, heating approach, included accessories, water capacity, grinder adjustment ranges, and stated warranty information. We also reviewed current Specialty Coffee Association and manufacturer brewing guidance on dose, yield, ratio, and extraction. We did not conduct hands-on product testing. The recommendations favor equipment that makes the beginner workflow measurable and repeatable, while being clear about the limitations of each setup.
Questions before building a home espresso setup
Can I use pre-ground coffee in an espresso machine?
Yes, especially with a pressurized basket. It can make a drink quickly, but it gives you much less control over extraction and freshness. A grinder is the better investment for anyone who wants to improve espresso rather than simply use an espresso-shaped appliance.
Do I need an expensive grinder for beginner espresso?
You need a grinder that can make small, useful changes in the espresso range. That is more important than buying the most expensive grinder available. The Encore ESP is a practical starting point because its first 20 settings focus on fine espresso adjustment while the rest remain useful for filter coffee.
Is a built-in grinder a bad idea?
No. It is a good idea when one appliance suits your counter and your habits. A separate grinder gives more flexibility and an easier upgrade path. An integrated grinder reduces clutter and simplifies the morning routine. Choose based on your space and appetite for tinkering.
Do I need a 58 mm portafilter?
No. A 54 mm Breville system can make excellent coffee and has its own accessories. A 58 mm system provides a more traditional accessory format and is appealing to people who expect to experiment over time. It is a compatibility decision, not a quality guarantee.
What is the first upgrade after the starter setup?
Usually a scale, if you did not buy one at the start. After that, wait. Use the machine, identify the point of friction, and upgrade for that reason. You may need a better tamper for a Gaggia, a dosing funnel for a messy workflow, or nothing at all.
What to buy
Buy the Breville Bambino Plus and Baratza Encore ESP if you want the most balanced first espresso setup: compact, flexible, measurable, and capable of milk drinks. Buy the Barista Express if one appliance fits your kitchen and you prefer a built-in grinder to a modular setup. Buy the Gaggia Classic Pro E24 and a separate espresso grinder if you specifically want a traditional 58 mm machine and are ready for a more manual routine.
Then add a small scale, use the accessories already in the box, and give yourself time with one coffee and one recipe. Espresso improves through small deliberate changes, not through an immediate collection of gear.